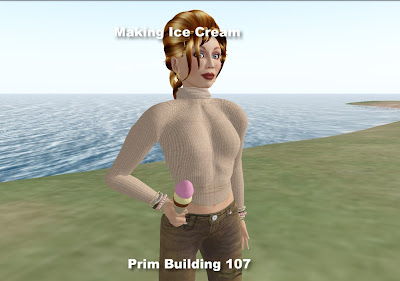
This tutorial covers:
* Working with sculpty prims
* Patterning textures
* The eyedropper tool
* Stretch (Shrink)
* Attaching an object to your avatar
4 prims --- apprentice
 Rez a Sphere.
Go to the Building Block Type and change to Sculpted.
Click on the Sculpt Feature window which looks much like a texture window and choose "Sculpt smooth_egg" which should be in your Open Library textures. It is now anyway.
Most normal sculpt map textures look like rainbows but this one appears to be trickily watermarked to make it difficult to take to another grid. Works for me :D
Move to the Texture tab and choose a texture for your ice cream. I used "MMplasterbeige" from the library. Choose a tint for your ice cream flavor. It can be any color you like.
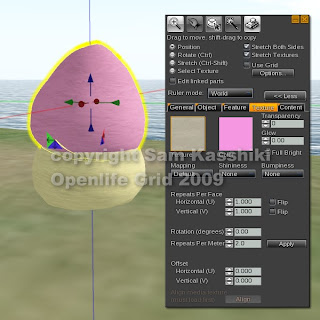 Make a copy (Shift + Drag) of your first scoop dragging UP on the blue arrow.
Change the sculpty to "mirror" to adjust the shape just a bit. Change the tint for the color.
Rotate the second scoop a bit and tilt it and make it a bit off center perhaps. Whatever you like to make it look different from the first.
You could change the size too if you wanted.
Feel free to make a third scoop if you are REALLY hungry.
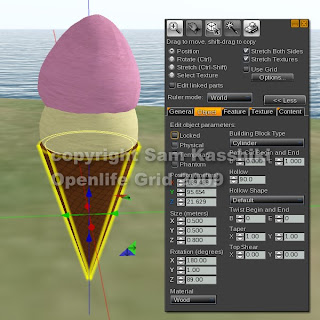 Shift + Copy the first scoop downward.
Change the shape from Sculpt to Cylinder.
Change the size to X="0.500", Y = "0.500", Z="0.800".
Hollow = "90". Taper X and Y = "1.00"
Change the texture to something that looks like a waffle cone. I used "Soft Brown Pattern 001" from the Library.
To make it look like a waffle cone, I changed the repeats to "30.000" and "30.000"
Under rotation I changed the degree to 60.00.
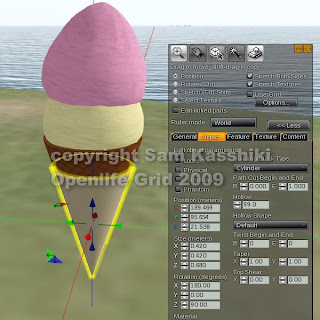 Shift Drag the cone down to make a paper protector.
Change the size to X="0.420", Y="0.420", Z="0.680"
Hollow the cylinder to "0.99". [Use .95 if you are on Phil's grid as that is the best you can do :D ]
Go to the Texture Tab and change the brown cone to a paper texture of your choice. I actually used the EYEDROPPER tool in the texture window and clicked on one of the ice cream scoops. This changed the cone texture back to the ice cream texture. Then I recolored.
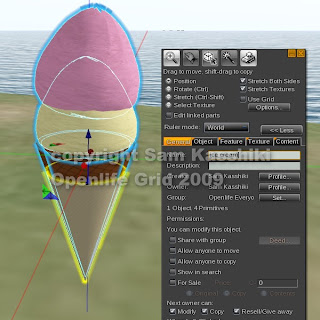 Link your cone with the paper protector as the root prim.
Give your cone a name and take a copy into your inventory.
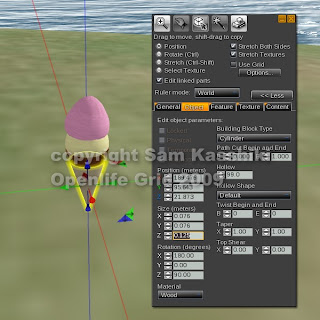 Shrink your cone using the stretch option until it is somewhere around people sized.
Move your camera away from the cone and note that the paper cover breaks up visually as you move away. Not good.
SO, we need to adjust that prim. And of course we can do that using Edit Linked Parts.
Before your start adjusting however it would be good to rename your cone to something like "cone small" and take another copy. Just in case you oops.
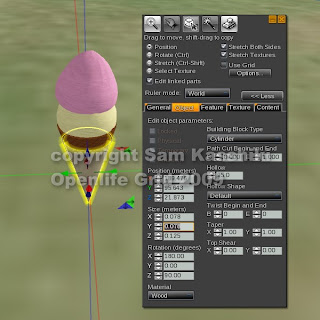 Resize the paper a bit using my numbers in the picture as a guide. They do not need to be exactly these numbers of course.
Move your camera in and out to make sure you cone paper is no longer breaking up. Then rename again and take another copy.
You cone is STILL where you have been building it.
Next we are going to attach the cone to our avatar so that we can "wear" our cone easily any time we want to.
You will need a pose stand for this part. Since pose stands don't currently work in the sandbox and the tposes from the library don't either, you may need to do some toing and froing depending on where you are building. I have a pose stand in my shoe store if you can't find another one :D
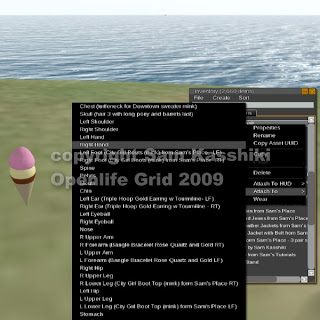 Find the last copy of your cone in your inventory. It will most likely be under Objects.
Right click on the cone listing in the inventory and Choose Attach To>
Then choose either Right Hand or Left hand from the menu.
I chose Right Hand.
You cone will appear in the vicinity of your right hand.
The rotation and position will not be correct. We have to fix that.
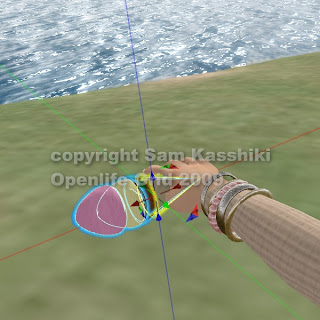 Use your arrows and rotation optionsto place the object in your hand. (Holding down the Ctrl key while the build menu is open and your object is selected will make a rotation wheel appear around your object) .
It is very likely that your test cone will STILL not be the correct size. I had to make mine even smaller. This is part of the process. So if you need to, adjust the size of the cone in your building area, take another renamed copy and attach THAT version to your hand.
This is tricky and takes some practice to do correctly. So don't be discouraged.
When you have the cone where you want it, DETACH it from your avatar.
Then go to the inventory, find that last, wonderfully fitting cone. Right click the listing and choose "Wear". From now on, the cone will fit your hand simply by telling it WEAR.
Happy sweetness!
