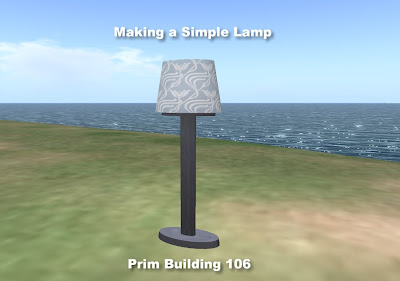
This tutorial covers:
- Working with the Tube
- Lighting Feature
- Working on Your Own :D
- Stretch (Shrink)
- Adjusting your finished build
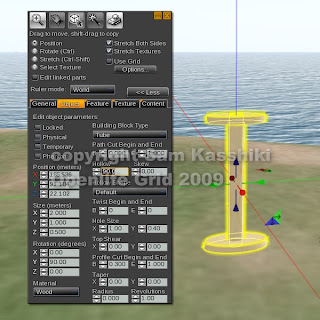 Rez a Tube.
Change the size to "X = 2.000, Y = "1.000", Z = " 0.500" or any size you would like to have.
Change the Hollow to "90.0".
Change the Hole size to X= "1.000", Y = "0.400"
Change the profile cut to B ="0.300" and E = "1.000".
Your lamp base should look like this.
Now, oh great apprentices :D I want you to pull a copy of this tube to the side (red or green arrow direction). Then I want you to change the numbers in the fields and see what happens.
So the main fields to explore would be Hollow, Hole Size and Profile cut to see how they change the look of the tube. You can of course change the size too. If you find a shape you like better than this one, then use that as your lamp base. If not, delete it and use this one. The point is to explore how those fields change the look of the shape.
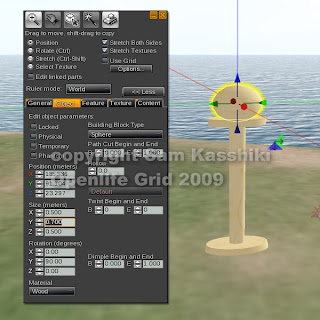 Make a copy (Shift + Drag) of your lamp base dragging UP on the blue arrow.
Change the block type to sphere.
Change the size to "X = 0.500, Y = "0.700", Z = " 0.500" or any size you would like to have.
In the texture tab, change the texture to blank and the color to white.
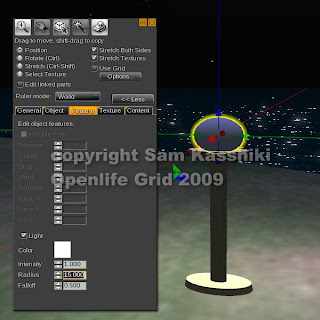 Change your time of day to midnight under World > Environmental Settings.
Go to the Features tab and put a check mark in the box called Light.
Play with the settings here until you are happy with the amount of light your lamp gives.
Note this light will ALWAYS be on, but won't show up in the bright of midday -- much light a light on in a brightly lit room in our corporeal world.
I changed the radius to 15.000 in my example making the light shine out farther into the room.
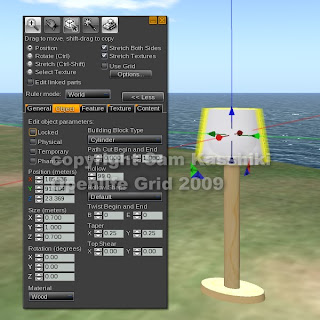 Change your time of day back to midday or your favorite building setting.
Shift Drag the globe (sphere) up, take the check box out of Light in the Features tab.
Change the shape to cylinder.
Change the size to X="0.700", Y="1.000", Z="0.700"
Hollow the cylinder to "0.99". [Use .95 if you are on Phil's grid as that is the best you can do :D ]
Change the taper to X and Y = "0.25" or whatever you like.
Texture your shade. I used a pattern on the outside and a matching plain color on the inside.
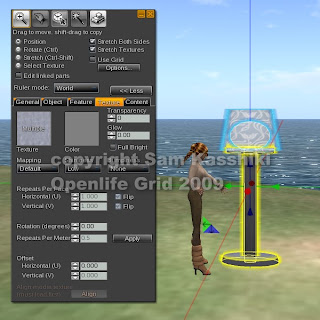 Link your lamp with the base as the root prim.
Go stand by your lamp.
OH DEAR!
This doesn't look like the actual size of a lamp. What to do?
We can change it. But first name your lamp and TAKE A COPY into your inventory. (Right click menu).
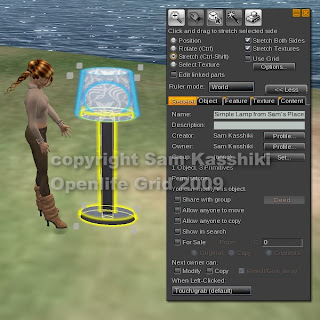 One simple way to adjust the WHOLE size of a linked object is with the Stretch feature.
This will enlarge (or shrink) the complete object in proportion.
Try that first by putting a dot in the the Stretch radio button at the top of the build menu.
Then grab one of the small white boxes and move in a diagonally downward direction to shrink or diagonally upwards to stretch as needed.
Once you have your lamp the approximate size you want, you can STILL fine tune it by using the Edit Linked Parts option that we learned previously. You can also change textures at this point, change the lighting amount etc. So make some adjustment to YOUR lamp and have it be your very own.
Congrats!
