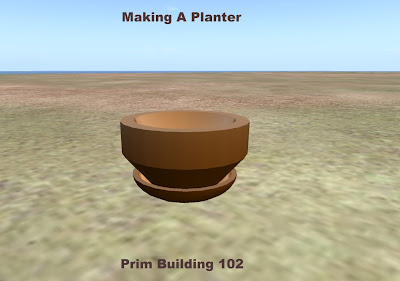
This tutorial covers:
- Building with Spheres
- Building with Tubes
- Hollows
- Path Cut
- Profile Cut
- Shiny Textures
- Linking Prims
This tutorial assumes you have worked through the numbers before it or have equivalent knowledge.
This template is best viewed at 800 so if you have wide screen, a window would be handy. The Blogger template breaks up at wider resolutions. You may be able to run this side by side on your screen too. That would be handy :D
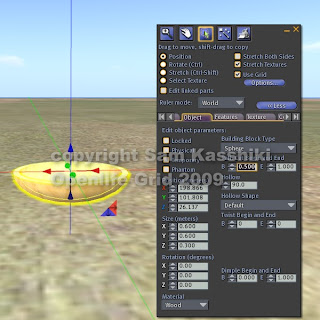 Right click on the ground, choose Create and rez a SPHERE with the wand.
Resize the sphere to X= "0.600", Y = "0.6oo" and Z="0.300".
Change the rotation to read 0, 0, and 0; that is "0" in all fields.
On the right hand side of the build menu change the PATH CUT to be B (for beginning) to "0.500". E (for end) stays as the default 1.000. Path cut takes a slice of pie so to speak out of the prim.
In the Hollow field (below path cut) type in "90.0" or use the arrow keys to achieve the same results. You should now have a hollow wooden flat dish.
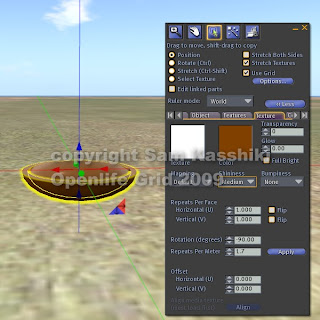 Go to the Texture tab and in the Texture window, change the texture from the default plywood to Blank.
Go to the Color window and choose any color you like.
In the Shininess window choose an option. I chose Medium in my example. This gives a nice enamel look to your planter.
If you can not see the shininess, you may need to turn that option on under Edit > Preferences > Graphics. Alternately you could have a older computer that cannot see the shine, but that is doubtful :D
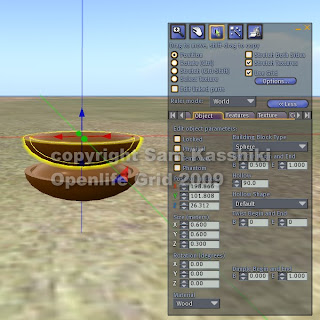 Now we are going to learn a trick you will use all the time when building on the Openlife grid.
With your colored dish selected, hold down the SHIFT key and using your mouse, pull straight up along the BLUE arrow. So you are dragging a copy of the bowl UP in this instance.
This is very much like what we did to get our picture frame out of the ground except that by holding down the Shift key, we make a copy of the prim. It is also lined up exactly which is often very important.
This is often called Shift - Copy or Pulling a Prim.
We now have two already colored dishes. That's why we colored FIRST :D
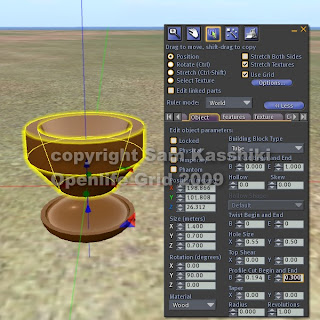 Next we are going to do a lot of changes to turn the dish into a typical planter pot with edge.
First, change the size to read X ="1.400", Y="0.700", Z = "0.700".
Change Hollow back to "0" and Path Cut to B="0" and E +"1.000".
Change the rotation so that Y = "90.0". X and Z stay at 0.
In the Building Block Type, use the drop down menu and choose TUBE from the choices.
Change the hole size to X = "0.55" and Y = "0.50".
In the Profile Cut fields, change the values to B (beginning) "0.194" and E (ending) "0.300" Profile cut peels away an layer of the prim, much
like peeling an orange.
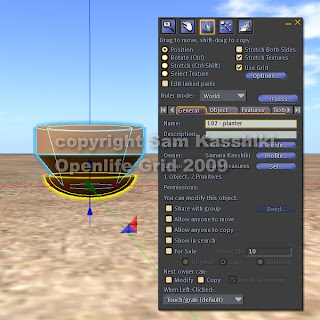 Now, adjust the planter pot to the dish using ONLY the blue arrow direction. Drag either up or down until the pot is settled in the dish. Make sure that the pot doesn't go down to far and show through the dish.
Let's put them together.
Click on the planter and then the dish. With them both selected in that order, hold down the Shift key and tap the letter "L" (for link).
This will connect the planter to the dish.
Give your planter a name of your choice and take it into your inventory using a right click and TAKE command.
